Connecting two Bluetooth headphones to your PC or laptop can enhance your audio experience by allowing you and a companion to enjoy music, movies, or games simultaneously. In this detailed guide, we will provide you step-by-step instructions on how to connect two Bluetooth headphones to your computer in a simple and easy way using virtual audio cable software, ensuring a seamless and enjoyable listening experience.

Step 1: Check Bluetooth Compatibility
Ensure that your computer has built-in Bluetooth capability or is equipped with a Bluetooth dongle in order to connect two Bluetooth headphones. This will enable you to establish a wireless connection with the headphones.
Step 2: Turn On Bluetooth on Your Computer
Activate Bluetooth on your computer by locating the Bluetooth icon in the taskbar or accessing the system settings. Toggle the Bluetooth option to “On” or use any dedicated Bluetooth button available.
Step 3: Download and Install Virtual Audio Cable 4.10 Software (Download Link Above)
In order to connect two Bluetooth headphones, it is necessary to install virtual audio cable software on your computer. A widely used choice for virtual audio cables is Virtual Audio Cable 4.10, which allows you to seamlessly direct audio between various applications. Obtain the suitable version of the Virtual Audio Cable software for your operating system by visiting their official website by clicking on the above download link and downloading it from there.
Right Way to Install Virtual Audio Cable in your Computer (Important Steps):
Once the software is downloaded into your computer, click on Virtual Audio Cable 4.10 Folder and open it.
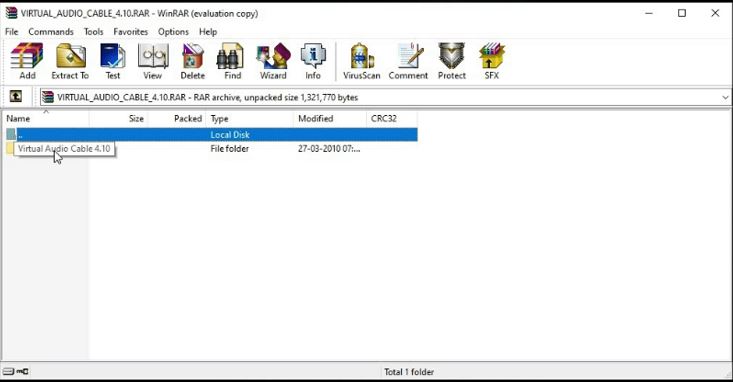
Click on the setup.exe file.
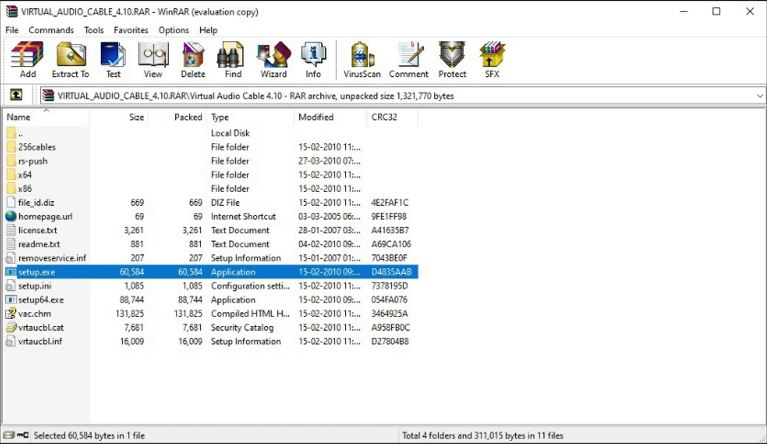
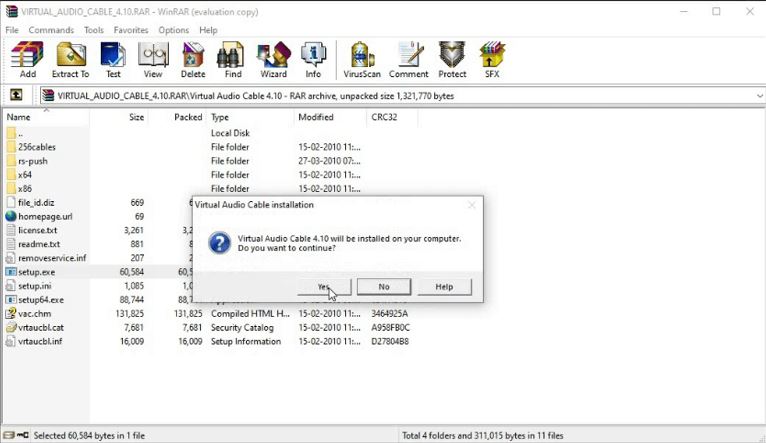
Follow the installation steps shown in the below images:
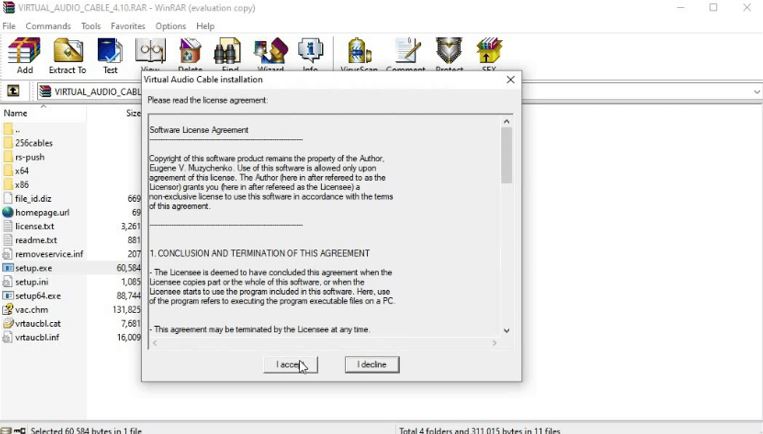
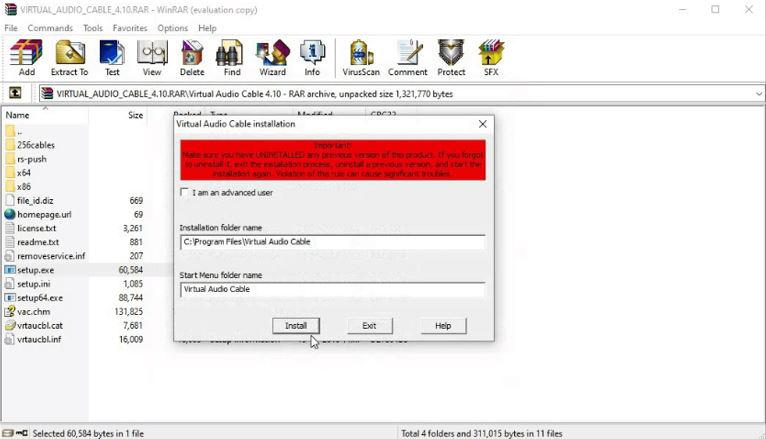
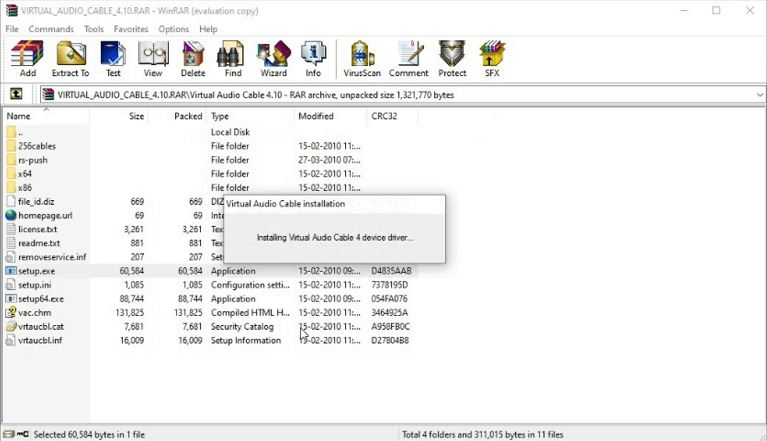
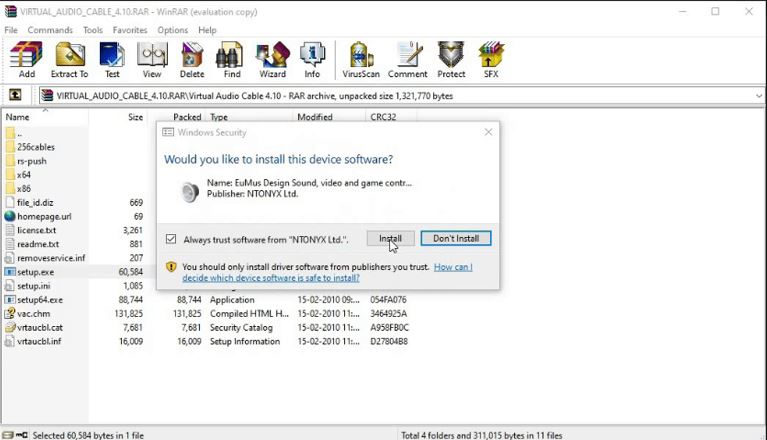
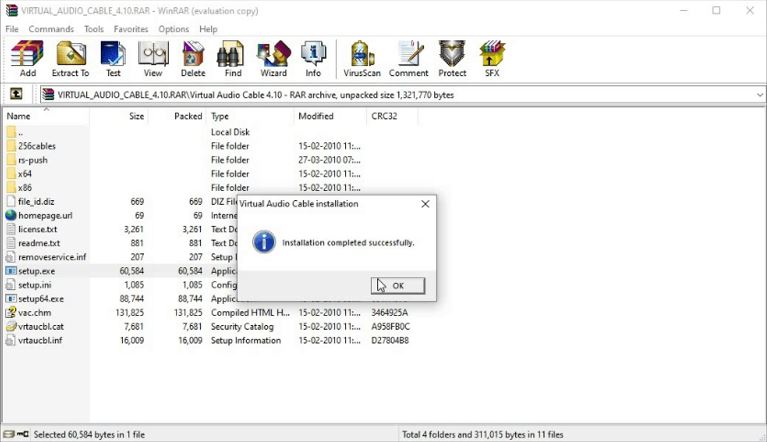
After the successful installation of software on your computer. Click on the x64 folder if you are using a 64-bit computer and the x86 folder if you are using a 32-bit computer.
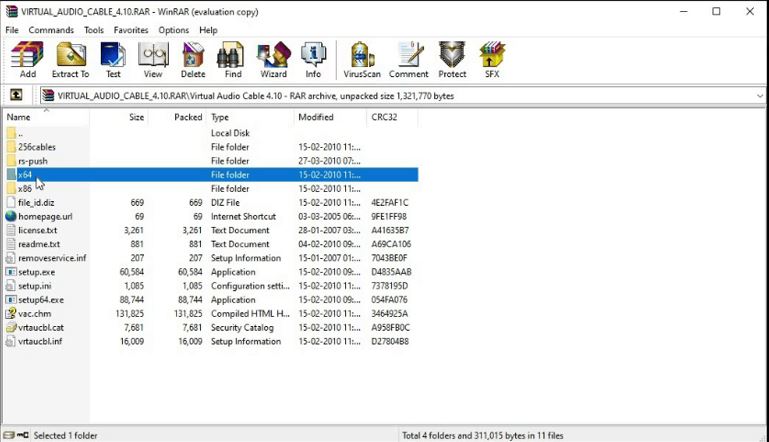
Once you click on the respective folder, drag and drop the audiorepeater.exe file into your Windows desktop.
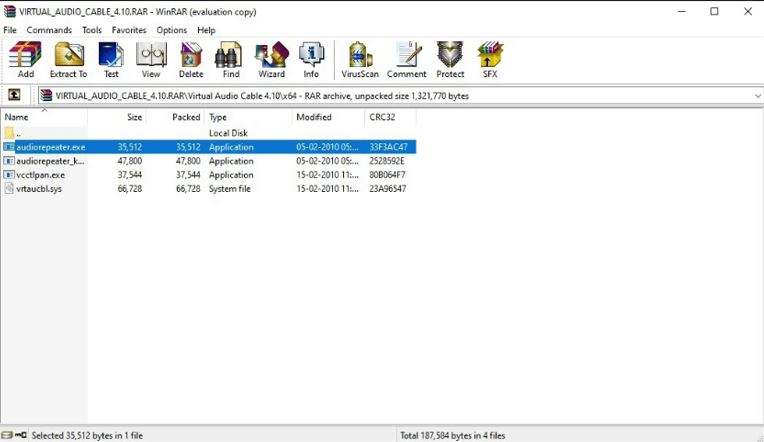
Step 4: Put the Headphones in Pairing Mode
Refer to the user manual or manufacturer’s instructions for your specific headphones to activate the pairing mode. Typically, this involves pressing and holding a dedicated button or a combination of buttons until a pairing indicator light starts flashing.
Step 5: Open Bluetooth Settings
Access the Bluetooth settings on your computer. On Windows, click the Bluetooth icon in the taskbar and select “Open Settings.”
Step 6: Add Bluetooth Device
Within the Bluetooth settings, look for an option that allows you to add a new Bluetooth device. On Windows, click on the “+ Add Bluetooth or Other Device” button.
Step 7: Start the Pairing Process
Select the “Bluetooth” option from the available device types. Your computer will begin searching for nearby Bluetooth devices.
Step 8: Pair the First Bluetooth Headphone
Locate the first Bluetooth headphone in the list of detected devices on your computer. Click on it to initiate the pairing process. Follow any on-screen prompts to complete the pairing.
Step 9: Pair the Second Bluetooth Headphone
Repeat the pairing process for the second Bluetooth headphone. Look for it in the list of detected devices and click on it to establish a connection. Ensure that both headphones are paired one at a time.
Step 10: Confirm the Bluetooth Connection
Once both Bluetooth headphones are successfully paired, you will receive a confirmation message or a connected status indicator on your computer. At this point, both headphones should be connected and ready to use.
Step 11: Open Sound Settings and follow the below-mentioned steps:
Depending on your computer’s operating system, you may need to adjust the audio output settings to ensure that sound is routed to both headphones simultaneously.
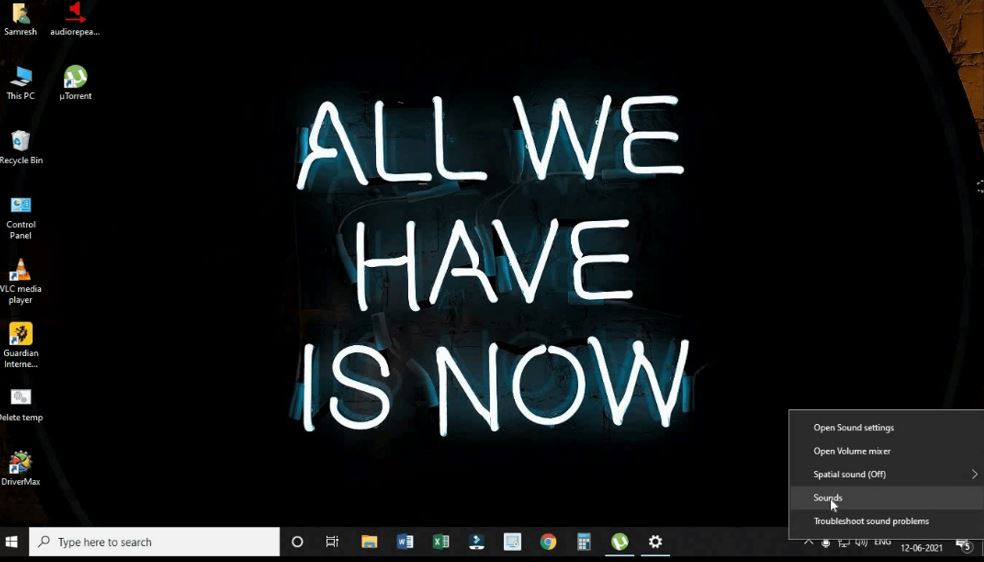
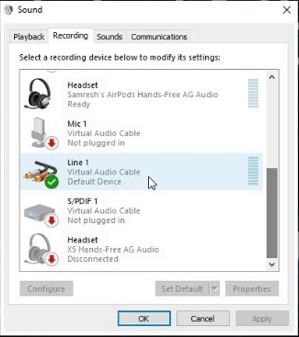
Click on Playback Tab and set “Line 1 – Virtual Audio Cable” as your default device.
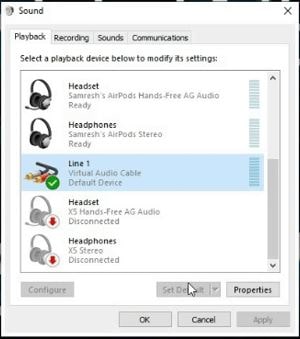
Now, click on Recording Tab and set “Line 1 – Virtual Audio Cable” as your default device.
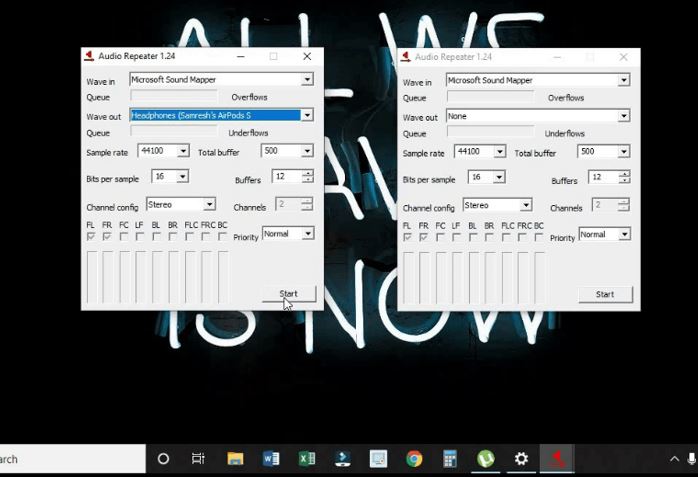
Click on audiorepeater icon twice which you have drag and drop into your desktop and open two windows of audio repeater as shown in the images below.
Now select “Microsoft Sound Mapper” in Wave In and select your “first connected Bluetooth headphones” in the Wave Out option.
Again, select “Line 1(Virtual Audio Cable)” in Wave In and select your “second connected Bluetooth headphones” in the Wave Out option.
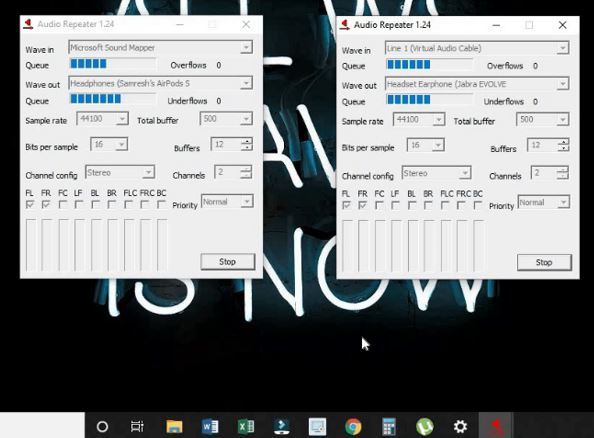
Now, click on the Start buttons in both the audio repeater windows and you see the waves in both windows as well.
The final step has been done and now you can use two Bluetooth headphones on your single PC or laptop.
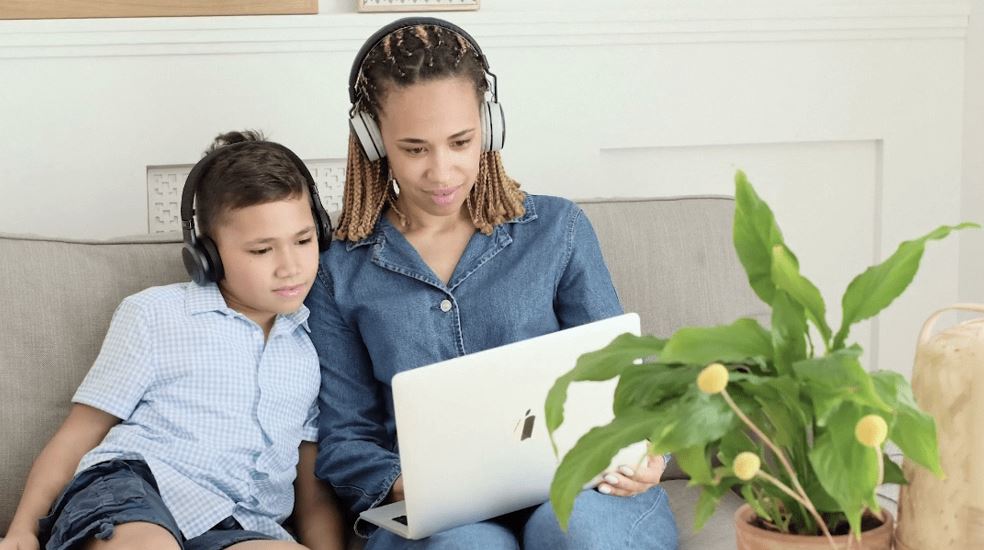
Watch the YouTube Video by clicking below

Conclusion:
By following these detailed steps, you can easily connect two Bluetooth headphones to your computer. Remember to check Bluetooth compatibility, turn on Bluetooth on your computer, activate the pairing mode on both headphones, open the Bluetooth settings, add and pair each headphone individually, and confirm the successful connection. Now you can enjoy your favorite audio content simultaneously with a friend or family member using two Bluetooth headphones connected to your computer.

Thank you for sharing this insightful and well-organized blog post. The information you presented was clear and concise, and I appreciated the additional resources you provided for further exploration. To explore more, click here.
Thanks for your valuable feedback 🙂