
“How to upgrade dual-core processor to i3 processor?” or “Can a dual-core be upgraded?” or “Can I upgrade dual-core to i3?” are the questions, if you are using a dual-core processor and are willing to upgrade same to an i3 processor. Upgrading the processor in your desktop can significantly improve your computer’s performance, especially if you’re upgrading from an older processor to a newer one. An i3 processor is a good option for those who need better performance for tasks such as web browsing, video conferencing, and light gaming. However, the process of upgrading your processor can be complicated, and it’s essential to have a thorough understanding of the process before attempting it.
Here are the steps you need to follow to upgrade your processor:
Table of Contents
- Check compatibility
- Check the power supply
- Check the BIOS
- Gather the tools
- Remove the old processor/dual-core processor
- Install the new processor/i3 processor
- Reassemble the computer
- Test the system
- Watch the YouTube Video
Step 1: Check compatibility
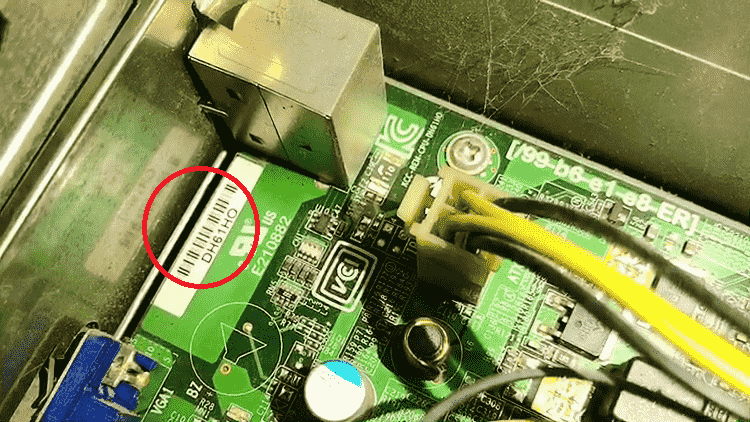
The first step in upgrading a dual-core processor to i3 processor is to determine if your motherboard is compatible with an i3 processor. Check your motherboard’s documentation or the manufacturer’s website to find out which processor types are compatible with your motherboard’s socket. The i3 processor requires an LGA 1151 socket type, so make sure your motherboard supports this type of socket before proceeding.
Step 2: Check the power supply
The i3 processor is more power-hungry than a dual-core processor. You need to check your power supply’s wattage to ensure that it can handle the new processor’s power requirements. Most i3 processors require a minimum of 65 watts of power, but it’s always better to have a little extra power to ensure stable operation. If your power supply doesn’t have sufficient power, you’ll need to upgrade it before proceeding.
Step 3: Check the BIOS
The BIOS is the basic input/output system that controls communication between the processor and other components of the computer. You need to make sure that the BIOS supports the i3 processor before installing it. Check the motherboard’s documentation or the manufacturer’s website to see if there’s a BIOS update available that supports the new processor. If a BIOS update is required, make sure to follow the instructions carefully to avoid damaging your motherboard.
Step 4: Gather the tools
Before you start the upgrade process, make sure you have all the necessary tools, including a screwdriver, thermal paste, and an anti-static wristband. The anti-static wristband is essential to prevent static electricity from damaging your computer’s components.
Step 5: Remove the old processor/dual-core processor
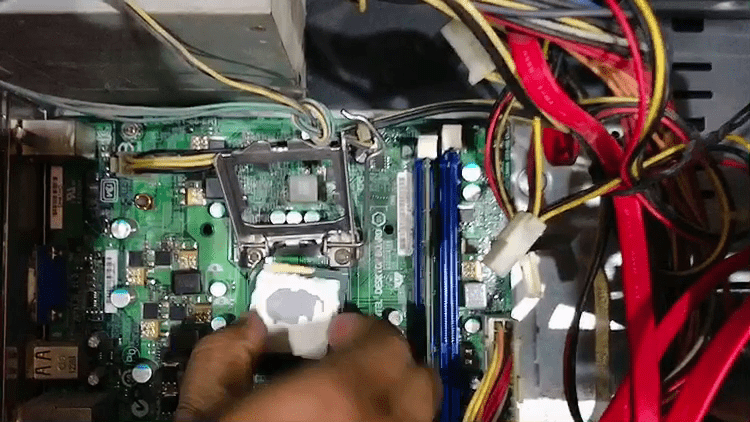
Turn off your computer and unplug it from the power source. Open the computer case and locate the old processor. The processor is usually located in the middle of the motherboard, under the heat sink and fan. Carefully remove the heat sink and fan from the old processor by loosening the screws. Once the heat sink and fan are removed, you can carefully remove the old processor from its socket by releasing the latch or lever that holds it in place.
Step 6: Install the new processor/i3 processor
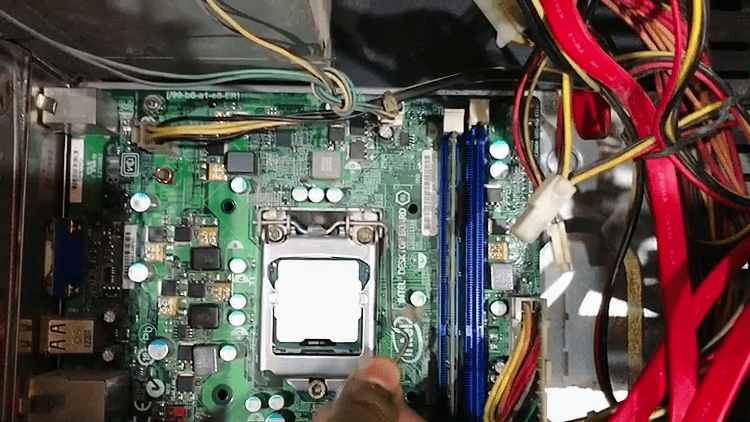
Carefully insert the new processor into the socket, aligning the notches on the processor with the socket pins. Gently press down on the processor until it clicks into place. Apply a small amount of thermal paste to the top of the processor, spreading it evenly over the surface. Make sure not to apply too much thermal paste, as this can cause the processor to overheat. Reattach the heat sink and fan, tightening the screws until they’re snug.
Step 7: Reassemble the computer
Put everything back in place, connect all the cables, and plug in your computer. Turn on the computer and enter the BIOS setup utility to check that the new processor is detected. If the new processor is detected, save the changes and exit the BIOS setup utility.
Step 8: Test the system
Once you’ve installed the new processor and reassembled your computer, you should test it to make sure everything is working correctly. Run some benchmark tests to check the processor’s performance and stability. If everything is working as expected, you’re done!
In conclusion, upgrading a dual-core processor to i3 processor in a desktop can significantly improve your computer’s performance. However, it’s crucial to check the compatibility of the new processor with your motherboard, the power supply unit’s wattage, and the availability of BIOS updates. Before upgrading, gather all the necessary tools and follow the steps carefully to avoid damaging your computer’s components. Once you’ve completed the upgrade, test your system to make sure everything is working correctly. If you’re unsure about any step or don’t feel comfortable doing it yourself, it’s best to seek professional help or you can even watch the below YouTube Video.
Also, if you are facing low RAM issues and want to boost your computer’s performance without spending money on physical RAM upgrades, then you can use Pen Drive as RAM.
Watch the YouTube Video
You can watch the below YouTube video on How to upgrade dual-core processor to i3 processor.

Feel free to comment below, if you have any questions or suggestions.
Very informative video..Thanks for sharing
useful article to dual-core processor to i3 processor