
Using a Pen Drive as RAM is an excellent way to improve the performance of your computer or laptop. It is a relatively simple process that requires only a few steps to complete. In this guide, we will provide you with a step-by-step guide on how to use a USB flash drive as RAM on your computer or laptop.
Table of Contents:
Step 1: Check the Compatibility to Use Pen Drive as RAM
Step 2: Insert the USB Drive
Step 3: Configure ReadyBoost
Step 4: Save Changes
Step 5: Monitor Performance
Extra: Switching a Pendrive from ReadyBoost to Normal
Bonus: Watch the YouTube Video
Step 1: Check the Compatibility to Use Pen Drive as RAM
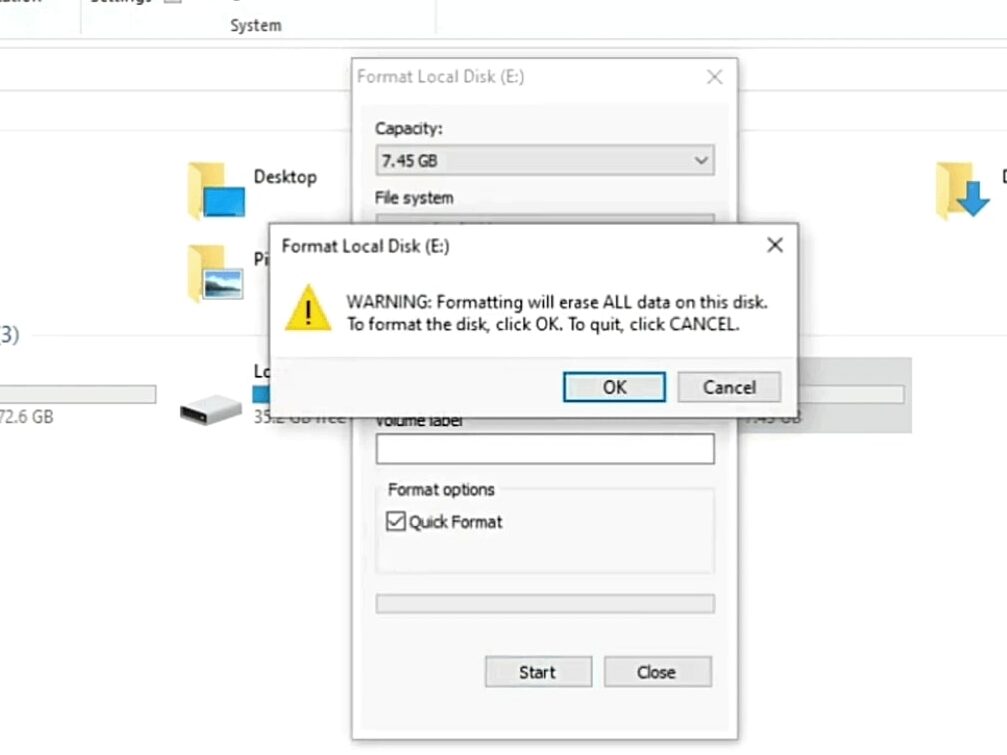
Before using your Pen Drive as RAM, you should check if your computer or laptop supports ReadyBoost. If your device runs Windows Vista or later versions, it should support ReadyBoost. You should also make sure that your USB flash drive has a minimum of 4GB of storage capacity and is formatted in NTFS, FAT32, or exFAT format. If your USB drive is not formatted correctly, you can format it by right-clicking on it in the “Computer” or “This PC” window and selecting the “Format” option.
Step 2: Insert the USB Drive
Insert the USB flash drive into your computer or laptop’s USB port. If your device supports ReadyBoost, you should see a prompt asking if you want to use the drive to speed up your system. If the prompt does not appear, you can manually enable ReadyBoost by right-clicking on the USB drive, selecting “Properties,” and then navigating to the “ReadyBoost” tab.

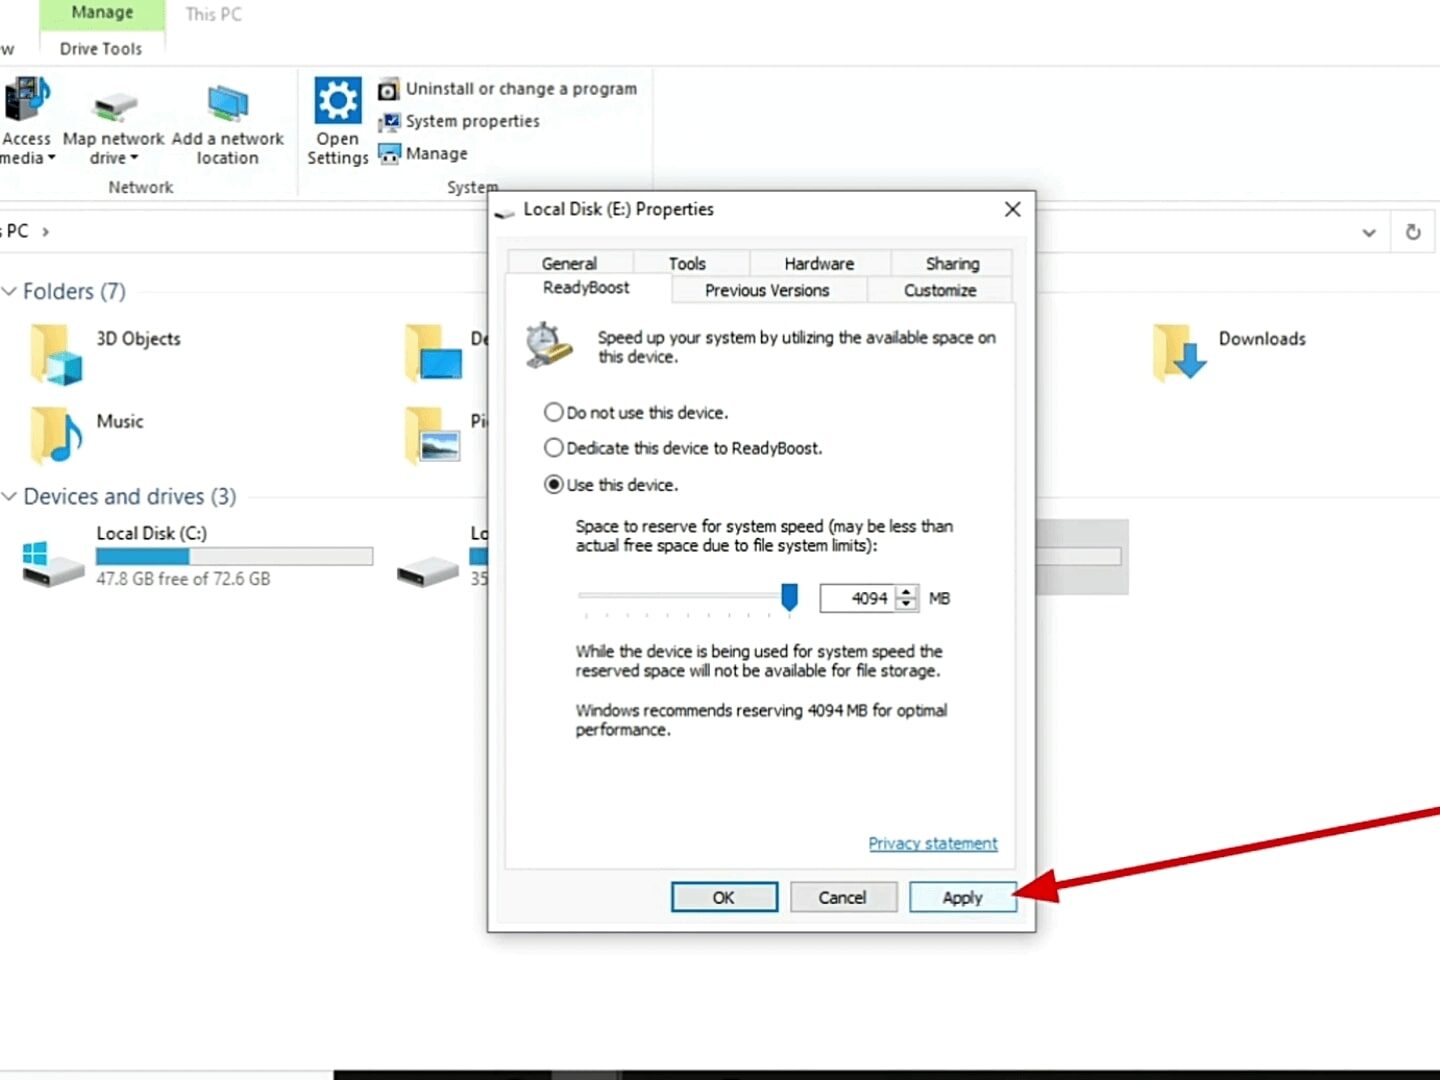
Step 3: Configure ReadyBoost
The next step is to configure ReadyBoost to suit your preferences. The prompt that appears after inserting the USB drive gives you options to use the device as a cache, reserve storage for system speed, or allocate the device for use as virtual memory.
Using the device as a cache means that Windows will automatically store frequently accessed files on the USB drive, so they can be quickly retrieved when needed. Reserve storage for system speed sets aside a specific amount of space on the USB drive for ReadyBoost. This option is useful if you want to ensure that there is always space available for ReadyBoost. Finally, allocating the device for use as virtual memory allows you to use the Pen Drive drive as additional RAM.
You can choose any of these options or let Windows choose for you. You can also adjust the amount of space you want to reserve for ReadyBoost. It’s recommended to reserve at least 1GB of space to see a noticeable performance boost.

Step 4: Save Changes
After configuring ReadyBoost, click on “Apply” to save the changes. The USB flash drive is now ready to be used as additional RAM for your computer or laptop.
Step 5: Monitor Performance
Once ReadyBoost is configured, you can monitor its performance by checking the “System Properties” on your computer or laptop. To do this, right-click on “Computer” or “My Computer,” then select “Properties” from the drop-down menu. From there, click on “Advanced system settings,” then select the “Performance” tab. You should see the amount of memory allocated for ReadyBoost under “Total paging file size for all drives.”
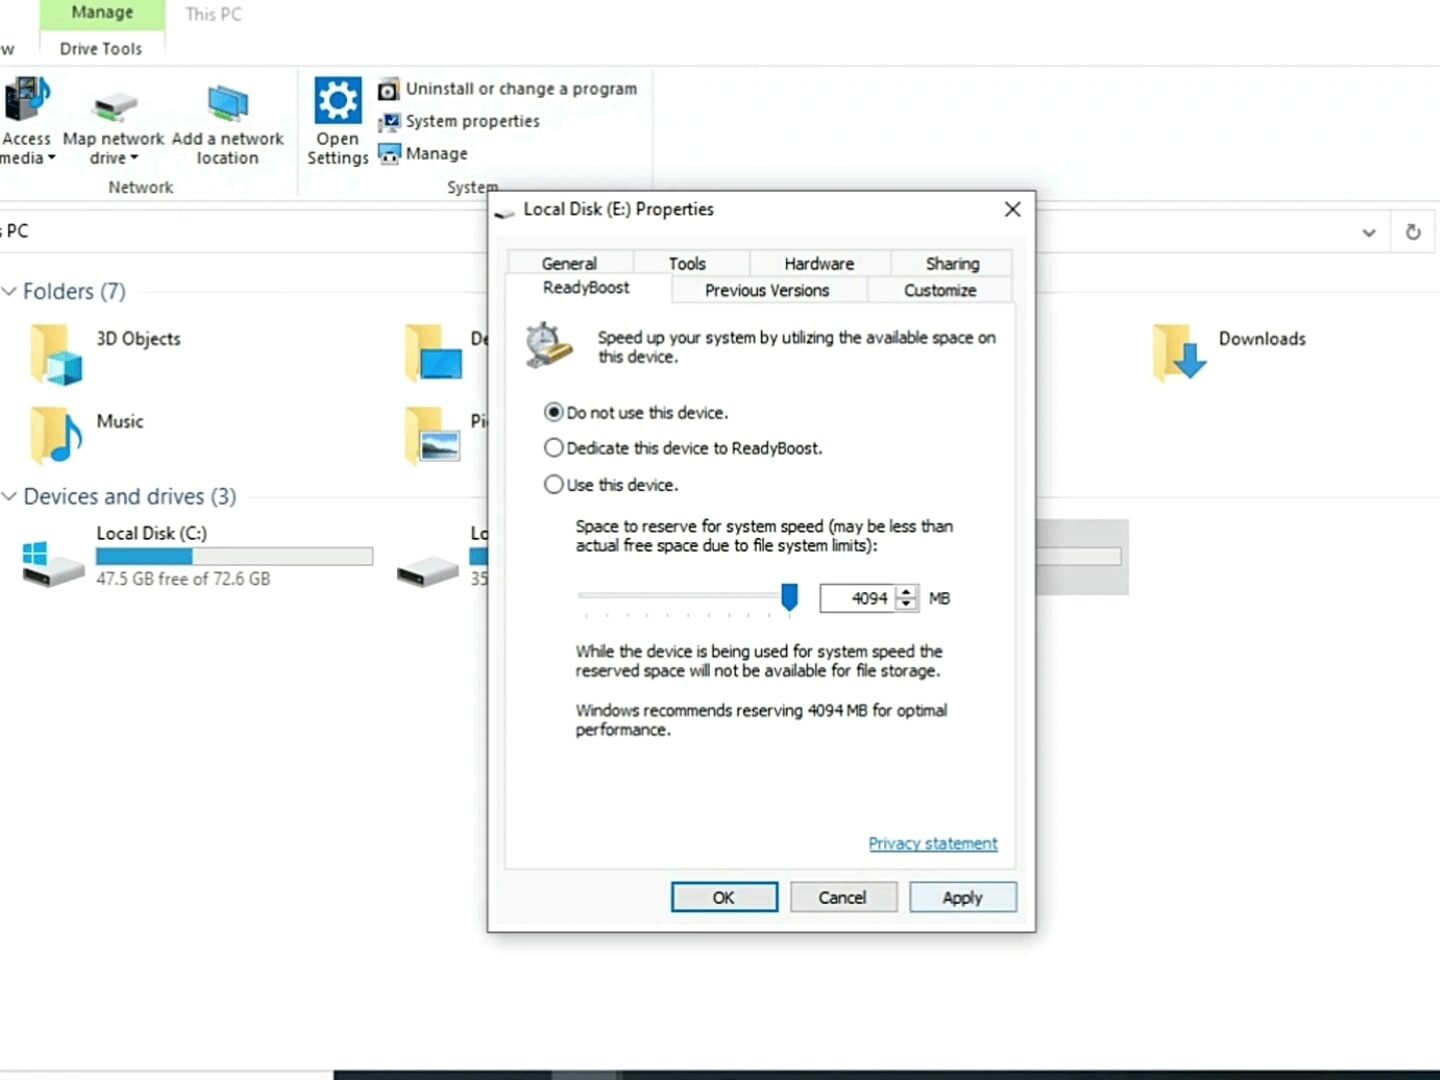
Switching a Pendrive from ReadyBoost to Normal
If you have been using a USB flash drive as RAM using the ReadyBoost feature, you may want to switch it back to its normal use. This can be done easily by following a few simple steps.
First, open the drive’s properties and select the “ReadyBoost” tab. From there, choose “Do not use this device” to free up the space on the drive and allow it to be used as a regular storage device again. You can also format the drive to remove any ReadyBoost cache files that may have been created.
It’s important to properly eject the USB drive before removing it to prevent data loss. Additionally, using a USB drive for ReadyBoost for extended periods of time can reduce its lifespan, so it’s recommended to use a dedicated drive for this purpose. By following these steps, you can easily switch your pen drive back to normal use.
Watch the YouTube Video
Click on the below to watch the video on How to Use Pen Drive as RAM.

It’s important to note that while using a Pen Drive as RAM can help speed up your system, it cannot replace the need for actual physical RAM. If your computer or laptop is running slow due to insufficient RAM, you should consider upgrading the RAM for optimal performance. However, if you have limited funds or your device’s RAM is not upgradable, using a USB drive as RAM can be a helpful alternative.
It’s also important to note that not all USB drives are suitable for use as RAM. When using a Pen drive as RAM, your device’s processor will communicate with the USB drive to retrieve data. Therefore, using a USB drive with a slow read and write speed can result in slower system performance. To avoid this, it’s recommended to use a USB 3.0 drive with a read and write speed of at least 100 MB/s for optimal performance. Additionally, using a USB drive as RAM can increase the wear and tear on the device, reducing its lifespan. Therefore, it’s advisable to use a dedicated USB flash drive for ReadyBoost to prevent any potential data loss. By following these simple steps, you can use a USB flash drive as RAM to boost your computer or laptop’s performance without having to spend extra money on physical RAM upgrades.
Also, you can upgrade your processor to speed up the performance of your computer as well, if you are ready to spend a handsome amount of money.
Please comment below if you have any queries/suggestions.